Tuesday 24 November 2009

things to do - really?

time goes by quickly here, and there's always something else ahead of us . . . to just take a moment out to sit and be takes planning - incredible. That needs to change. I need to learn from my surroundings, not get so caught up in rush of fruit and market and visitors and newsletters and ideas and and and . . .

but allow myself, gift myself, a moment to do nothing, but to be. Learn from my neighbours:

Tuesday 17 November 2009

rain

The rains have come. Great sheets of water slicing from the sky, thundering on the tin roof, overflowing the rain barrels, forming great muddy puddles, washing away leaves, twigs, branches and boughs, snarling clumps of debris below the bridge. Sounds like winter, and it would be fun if we could bundle up, close the doors and snuggle into a cozy fireside with mugs of hot cocoa. But no, we live in an open house, barely screened - ideal in the sunshine or showers but wet and damp and chill in these drenching seasons. The two of us and the dogs huddle in corners seeking solace from the drafts and the drifting rain, the floor wet and muddy from dogs who must go outside every once in a while, hardly able to hear ourselves from the noise of the rain on the roof. When the phone rings we must go below the house to where it's quieter.

rain through the flat windows, click to see the streams pouring from the roof.
The flat where my work kitchen is, is cozier, it has 4 full walls, all the way from floor to roof. The windows are screened, the tin roof is lined with wood. The oven is there. Soon I'll brave the 400 steps down the sodden, slippery hill through wet jungle foliage slapping my face and dripping down my neck, watching my every move as the wooden steps are like ice in this weather, squelching and squishing through the mud. Rain.

Sunday 15 November 2009

Paper making workshop

There's more to our farm than just the farmer and myself. Anyone who has visited the website will quickly see that there are others. The others are the farmer's son and his very capable partner, and our 3 and a 1/2 workers. Together we are able to run the farm, garden and some more besides.

One of the besides is CARTS. CARTS is a joint venture between ATEC and the Botanical Garden. CARTS stands for Colectivo Artistico Reciclando en Talamanca por la Sostenibilidad, a Recycled Arts Collective for a Sustainable Talamanca (our area of Costa Rica), and is a collective of women artists working with recycled materials producing unique, useful, artistic pieces.

CARTS is sponsoring free workshops at the farmers' market the second Saturday of each month. Each workshop focuses on an art project with recycled materials. This past Saturday it was paper making with the very capable partner.

Paper making is simple, and it's fun. Take used paper - for example newsprint, old notes, yellow pages, receipts, whatever, and tear into strips then 1 to 2 inch squares. Soak for at least an hour, then whizz in a blender 'til it's the consistency of oatmeal. Pour into a tub with more water and agitate (small leaves, petals, other decorations can be added at this point). Take your screen and deckle and in a smooth movement lower at an angle into the tub, level off and bring up horizontally. Allow the water to drain. Remove the deckle and in another smooth movement invert the screen with the paper pulp onto a waiting piece of felt. Press the paper through the screen to ensure separation then lift the screen. Use a sponge to press - gently - to remove excess water. If you have enough space, the paper can be left to dry further on the felt. If not transfer to newsprint and place in the sun or somewhere airy to dry. For best results place weights on the paper to improve writing texture and form.

The workshop took place in the middle of the market space to a good sized audience of adults, a child or two, and stall holders. The participants ranged from complete novices to those who had experience and were there for the fun of helping and making. Some of the locals had never seen paper made before and were impressed at how easy it was with recycled paper - part of the purpose of these workshops is to encourage re-use and recycling (two concepts oddly new to this culture which is quickly becoming as throwaway as the US and Europe ever was). It was a successful workshop with people proudly leaving supporting freshly made sheets decorated with petals, leaves and coloured print.

December's workshop will be baskets made from tetrabrik, January I'll give a workshop on purses crotcheted from plastic rice and sugar bags. CARTS is putting together a catalogue of products, I'll try to link it to this blog.

Thursday 12 November 2009

butterfly

I'm drying papaya seeds so that I can sprout them for salad mixes. The fermenting fruit attracts butterflies, wasps, bees, all sorts of visitors. Here's an owl (thanks Mike) butterfly from the side you rarely see.

Monday 9 November 2009

My new guide book!

Here's a few sample pages from my guide book to growing and gathering food in lowland Costa Rica. There's 68 pages of information and recipes on what grows here and what to do with it. It was really fun to write and I'd like to do some more, perhaps leaflets on cacao, black pepper, nutmeg - things that grow here on the farm, maybe a medicinal guide to very local plants, maybe a plant lore book . . . the list goes on of all the things I can do with all the free time I have (?). I want to print the book for sale at the farmers' market and in town, and also offer it online as a pdf file. Quite pleased with it!
click the photos for a closer look


Wednesday 4 November 2009

jammin', with fudge

After a long hiatus I made some araza jam this morning. There's a small season starting and I was able to pick 2/3rds of a bucket of fruit to make 11 jars of what has become our signature jam. I also found just enough nutmeg to make two jars of nutmeg butter. What incredible smells filled the kitchen! Especially as we were also slicing ginger and processing black pepper.

I've been trying to make fudge these last two days. Back in the US, my class would make and sell fudge by the caseload for Christmas fairs. We could knock out fudge like no-one else and had all the packaging and presentation - and sales talk - down to a tee. But this is the first time I've tried it in three years and the recipes from up north don't work so well due to temperature and humidity differences, plus the farmer won't eat butter (!). And there's the caveat that everything we offer at the farmers' market comes from the farm. So. Here's my new recipe:

Coconut Chocolate Fudge
one serving (enough for 4 people after dinner treat)
1 1/2 cups sugar
1/4 cup coconut oil
2/3 cup coconut milk
1/2 cup powdered cacao
1/4 teaspoon vanilla

Melt oil, milk and sugar together in heavy bottomed pan, bring to boil and boil until it reaches the soft ball stage. Remove from heat and stir in vanilla. Wait for 5 minutes then stir in powdered cacao. Wait 5 more minutes then beat until mixture loses its glossiness. Pour into silicon mold (or onto greased parchment paper). Allow to cool before eating (if possible). The cacao and coconut milk comes from the farm, the oil came from Bastimentos Island, the vanilla from Mexico (but soon from our farm) and the sugar from the store. No photos, we ate it before I had the chance to bring out the camera.

'making' black pepper


The farmer has been producing organic black pepper for over twenty years here on the farm. Pepper was introduced as an alternative cash crop for cacao plantation farmers after the cacao blight destroyed farm incomes throughout this region. We are the only people still producing black pepper in this area. The pepper is marvelous: we sell to tourists at the garden and to locals and restaurants alike, the farmer receives emails regularly from all over the world asking for more of that "wonderful pepper we bought on holiday". People living here take it as a gift on their journeys and those who visit regularly stock up on pepper for their time back home. We mill just enough each Friday night to sell at the market on Saturday mornings, and we always sell out. It's just so good: fresh, hot, bright, clean, crisp, pure . . . organic, excellent!

The black pepper plant (Piper nigrum) is a flowering vine native to India. Once the most expensive spice on earth, once more expensive weight for weight than gold, it was the main push behind the sea race to India (and hence responsible for the discovery of the Americas!).

The plant is grown on trees, stakes or trellises, here we use Madera Negra sticks which root and sprout branches giving some shade and protection. Madera Negra is leguminous and fixes nitrogen in the soil, thereby providing a nitrogen source for the pepper vines. We propagate through air-layers, production of fruit begins within a year, but for solid production we wait two years. pepper can be harvested throughout the year, though the main harvest comes in September through November.

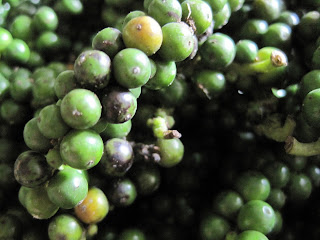
Black (and green) peppercorns are produced from the unripe whole berries of the pepper plant. Each berry contains a single seed, covered by a very thin layer of pulp and skin. It is the skin and pulp which gives the colour and the special taste to black pepper. We pick our pepper when the seed is developed and cannot be squished flat between the finger and thumb. Berries ripen from the top of the stalk down, so we always try to squish the bottom berries to check for readiness.

White peppercorns are produced from the ripe berries. Ripe berries are red in colour, to produce white peppercorns the berries are soaked in water for a week until the flesh ferments and falls from the seed. the seed is then dried - this dried seed is a white peppercorn. We don't produce white peppercorns, just the black (although for our French and Italian clients we sometimes supply fresh green peppercorns).

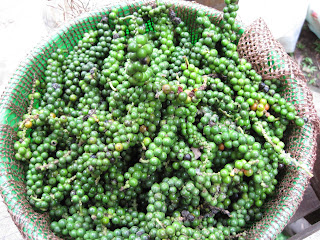
To make black pepper first pick the perfect pepper.


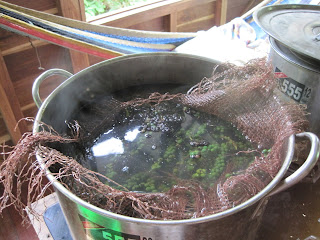
Boil in water for 4 minutes, or thereabouts. The boiling cleans the pepper and begins to break down cell walls allowing the pepper to change colour from green to black.


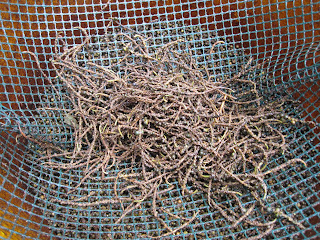
After boiling, the hot pepper is rubbed across a mesh to separate the berries from the stems.

The stems are used as mulch.

The blackening berries are left to dry in the sun.
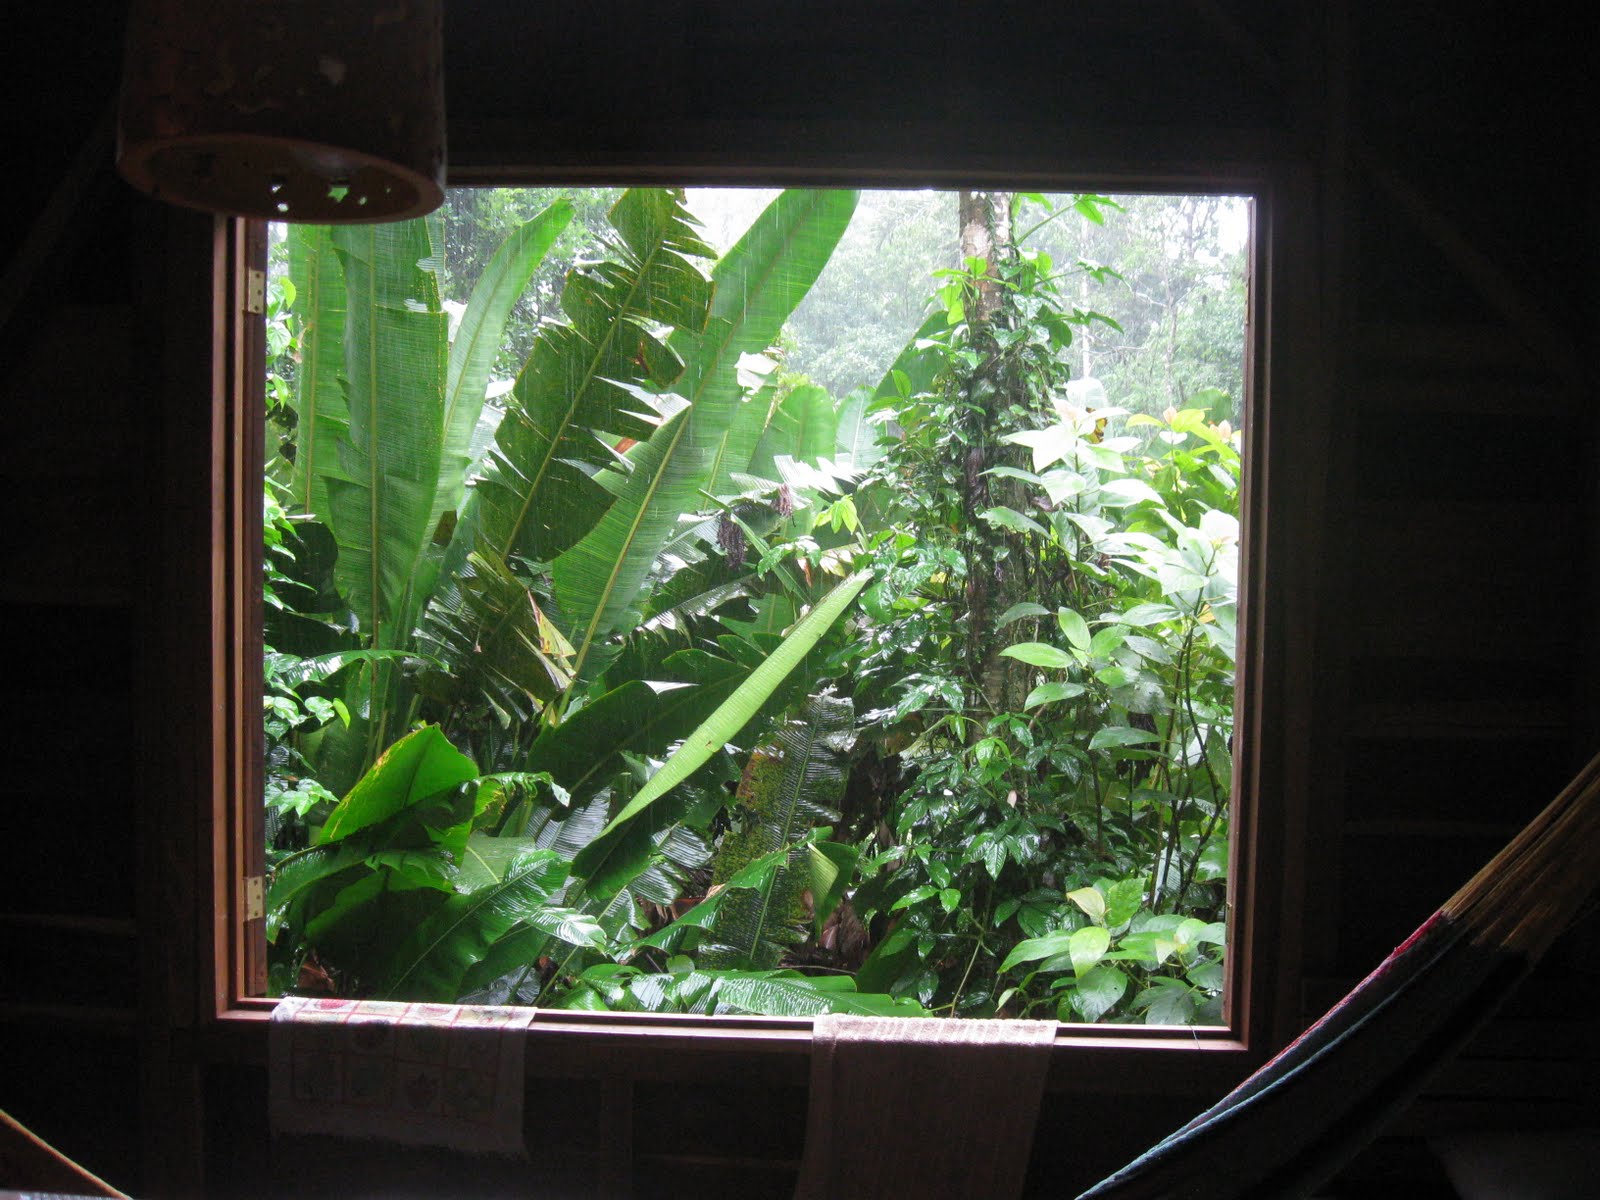
Monday 2 November 2009

cacao harvest time


roasted cacao beans

We're in the middle of our cacao harvest. It takes a while, spread out over a course of maybe 5 weeks as we wait for pods to ripen. The cacao pods grow from the trunk and branches of the tree and change from a pale green to a darker yellow or red before they are ripe.
This farm used to be a cacao plantation, but was abandoned in the 1970s due to the Monila blight which took out almost all the cacao farms in this area. The blight attacks the fruit, not the tree, so there are still many many hundreds of trees around which produce fruit. The harvest is a spotty thing, as we do not treat the trees or fight the blight, we harvest what we can: the rest the squirrels or blight takes. It's not a huge harvest, just enough to last us the year.

The pods are hand picked with a curved blade on a strong stick - cacao pods rarely fall by themselves and last years blackened, eaten out pods can still be seen on the trees. They do make an excellent mulch though, so we like to see them on the ground. After picking they are cut open with a machete and the insides scooped out into a bucket. I've written about cacao several times on this blog (search for cacao in the search tool), so won't go into too much detail herte about how it all looks. When the bucket is full it is emptied into a gunny sack - in our case old rice sacks, and hung in a cool covered area, for 5 days or so. In the past the cacao was piled onto banana leaves and covered with more leaves.

Inside the sack the beans ferment in their white gloopy pulp: fruit flies, beetles, earwigs are all part of the process. The bag smells like fairly bad and oozes a sticky transparent juice. Not really what one would associate with chocolate.

After 5 days the beans look like beans - the white pulp covering is gone and they look like smooth plump almonds in a tawny covered skin. Now they are sun dried for 3 or 4 days or until they snap cleanly when broken in two. At this stage they are ready for storage - the major chocolate producers buy them at this point and roast them as needed. We roast ours just before we use them for the best flavour.

The beans are edible at every stage, raw in their pulp they are bitter and 'green', taste nothing like chocolate. Dried they are still bitter and smell a little chocolately but have no real taste. After roasting they begin to have the wonderful aroma of chocolate. We use our in granola bars, in granola, in dried fruit mixes and to munch on when we need an energy boost.

cacao pods on the tree

pile of pods, each pod contains 20-50 beans

the gunny sack with beans and pulp

inside the gunny sack, day 2